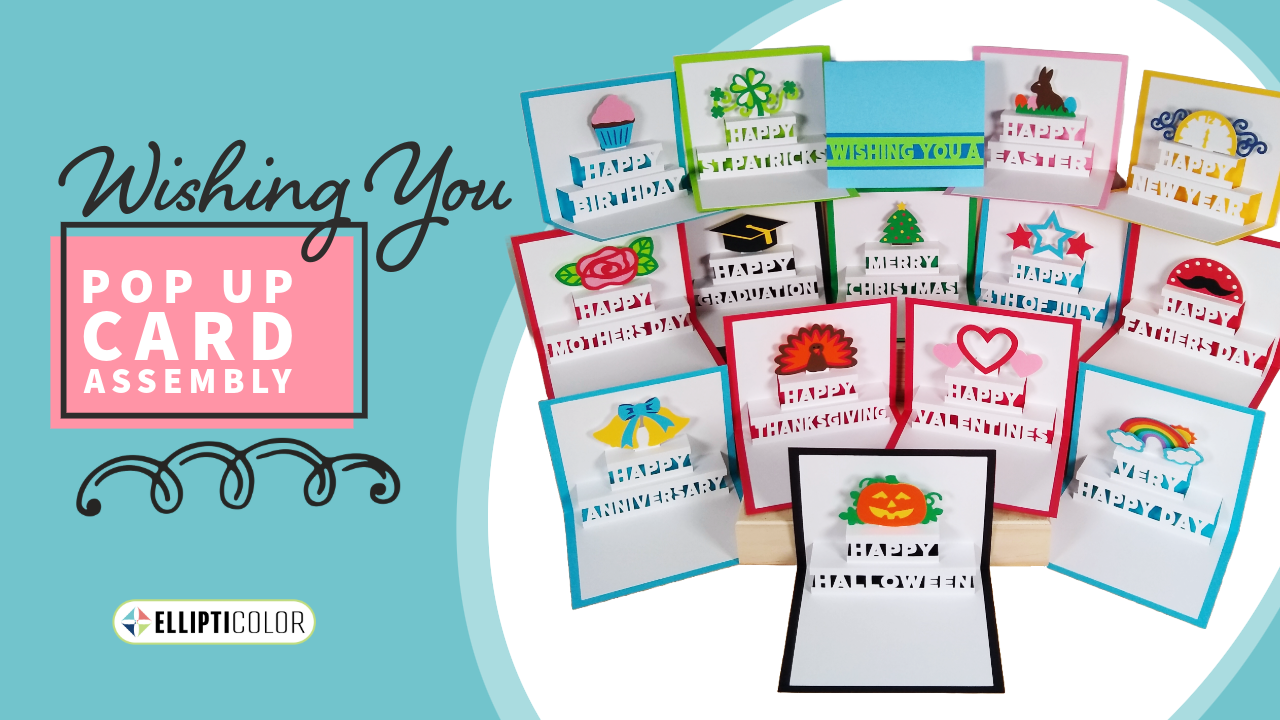
One of the best things about the Wishing You Cards is the ability to personalize them for a special occasion. Whether it's a birthday, anniversary, holiday, or just because, these cards can be perfectly customized. With 15 designs to choose from, pieces that can mix-and-match and the ability to add extra embellishments, change up the colors, or include a special message, the possibilities to customize are endless!
Also, did you know you can make your own card designs and paper craft projects with the Wishing Card pieces and your craft supplies? Be inspired to create in our post: 20+ Design Ideas Using the Wishing Card Pieces.
Are you ready to make one of these cards? Check out our tutorials to help you with assembly, plus I'll teach you some tips and tricks that I've discovered to make the process easier. Pick the tutorial that works best for you!
- Keep reading for step-by-step instructions
- Watch our video tutorial at the end of this article, or find our Wishing You Pop Up Cards Assembly Video on YouTube.
- Use the PDF Maker Guide (with images and a diagram) included with the digital files for each card.
Prepare to Make a 'Wishing You Card'
Materials Needed
- Card Stock (colors vary depending on card)
- Glue
- Cutting Machine (Such as Cricut, Silhouette, Brother ScanNCut, etc.)
- 2 tools with a straight edge (Popsicle stick, tongue depressor, ruler, bone folder)
- 1 pointed tool (ball stylus, toothpick)
Digital Files Needed
You will need one of the 'Wishing You Cards'. There are 15 styles to choose from! View all the options at the end of this post.
Prepare Pieces to Assemble
- Cut out the SVG or DXF pieces for one of the 'Wishing You Cards'.
(Tip: Refer to the Maker Guide PDF resource included with the Wishing Card digital files for helpful cutting and group/attach instructions.)
Card Assembly Instructions
Each card comes with a pop-up insert, a wishing phrase banner, and a themed decoration. The pop-up insert is folded the same way for each of these cards.
Prepare Pop-Up Insert
- Sometimes little pieces remain inside the letters after I take the popup piece off my cutting mat. If there are still little pieces inside your letters, use a pointed tool such as a toothpick or ball stylus to quickly pop out the pieces.
- Next, check the side slits to make sure they are completely cut out.
Fold Pop-Up Insert
The pop-up piece will look like 3 stair steps after it is folded.
- Fold the entire insert in half backwards along the middle score line.
- Open up the card.
- Use 2 straight edged tools to start bending the top and bottom score lines for the middle and bottom stair steps. Do one score line at a time. Insert one tool through the side slits of a stair step. Place the second straight edge along the front of the scoreline and gently pull the tool in the slits slightly forward to start training the fold.
- Repeat for the top and bottom scorelines of the 2 stair steps.
- Flip the insert over and from the back, finish creasing the folds you just started, by using your thumbs to pull the tops of the stair folds into place. Be careful not to crease the card beyond the edge of the stair step.
- Make sure all of your folds are creased well.
- Open the insert and poke the top stair from the back to pop it into place.
- Check to make sure all of the stairs are popping out properly. It should look like 3 stair steps.
- Close the insert and firmly crease each score line.
Gluing it Together
- Fold the outer card piece in half along the score line.
- Place the folded pop-up insert inside the outer card. Line the insert up with the center fold line of the outer card.
- Add glue to the pop-up insert on the three edges that are not next to the fold, and then carefully close the card.
- Flip the card over and add glue to the other three pop-up insert edges. Close the card and allow the glue to dry.
- Glue the 2 banner pieces together and then glue the banner to the front of the card.
- Glue the decoration layers together and then glue the decoration inside the card on the top step.
Not only are these cards fun and creative, but they also show that you put extra thought and effort into celebrating your friends and family.
So, the next time you need a card for a special occasion or holiday, personalize one of our Wishing You Cards! And, don't forget to find further inspiration in our post: 20+ Design Ideas Using the Wishing Card Pieces.